 admin1
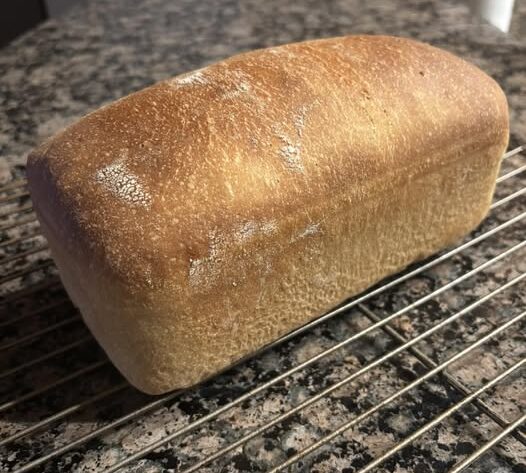
There is something special about a freshly baked loaf of homemade sourdough bread. The crisp, golden crust, chewy interior, naturally fermented flavor, and beautiful open crumb make it one of the most rewarding breads to bake at home.
This recipe uses a simple combination of active sourdough starter, bread flour, whole wheat flour, water, and salt. It doesn’t require commercial yeast, but it does require patience. The dough goes through a long fermentation and overnight cold proof, allowing the natural starter to develop flavor and structure.
The result is a rustic artisan loaf with a beautifully crisp crust and soft, airy center.
Why You’ll Love This Sourdough Bread
- Naturally fermented
- No commercial yeast
- Crisp, golden crust
- Soft and chewy interior
- Wonderful tangy flavor
- Only a handful of ingredients
- Excellent for beginners
- Perfect for toast and sandwiches
- Delicious served warm with butter
Ingredients
Makes: 1 large loaf
For the Sourdough
- 100 g active sourdough starter
- 375 g warm water
- 450 g bread flour
- 50 g whole wheat flour
- 10 g fine sea salt
The original recipe uses water around 75–80°F (24–27°C).
For Building the Levain
- 20 g active sourdough starter
- 100 g water
- 100 g flour
You’ll prepare this mixture ahead of the main dough and allow it to become bubbly and active.
Equipment You’ll Need
- Digital kitchen scale
- Large mixing bowl
- Dough scraper
- Proofing basket or banneton
- Clean kitchen towel
- Bread lame or very sharp knife
- Parchment paper
- Dutch oven with lid
- Wire cooling rack
A kitchen scale is particularly useful for sourdough because weighing ingredients gives you much more consistent results than measuring flour by volume.
Recipe Information
Prep Time: 30 minutes
Levain Time: 4–6 hours
Bulk Fermentation: 4–6 hours
Cold Proof: 12–16 hours
Bake Time: 45–50 minutes
Total Time: Approximately 13–17 hours
Yield: 1 loaf
Difficulty: Intermediate
Initial Oven Temperature: 475°F (245°C)
Final Oven Temperature: 450°F (232°C)
Because sourdough fermentation depends on starter strength and room temperature, the timing can vary. Watch the dough rather than following the clock alone.
How to Make Homemade Sourdough Bread
Step 1: Prepare the Levain
Start by building your levain.
Combine:
- 20 g sourdough starter
- 100 g water
- 100 g flour
Mix thoroughly until no dry flour remains.
Cover loosely and leave it at room temperature.
Allow it to ferment until it becomes bubbly, active, and approximately doubled in volume. Depending on your starter and kitchen temperature, this can take several hours.
How Do You Know It’s Ready?
Your levain should:
- Look visibly bubbly
- Have increased significantly in volume
- Smell pleasantly fermented
- Have a light, aerated texture
If your starter is sluggish, give it additional time rather than rushing to the next stage.
Step 2: Mix the Flour and Water
Combine the bread flour, whole wheat flour, and water in a large bowl.
Mix with your hands or a dough scraper until all the flour is hydrated.
The dough will look rough and shaggy.
Don’t worry about achieving a smooth dough yet.
Cover the bowl and let it rest for approximately 30–60 minutes.
This resting stage allows the flour to absorb the water and begins developing the dough’s structure.
Step 3: Add the Levain
Add the prepared levain to the dough.
Use your hands to gently work it into the mixture.
Pinch and fold the dough repeatedly until the levain is evenly distributed.
Cover the bowl and allow the dough to rest for approximately 30 minutes.
Step 4: Add the Salt
Sprinkle the 10 g of fine sea salt over the dough.
Add a small amount of water if necessary to help distribute the salt.
Using wet hands, pinch, fold, and squeeze the dough gently until the salt is incorporated.
The dough should gradually begin to feel smoother and stronger.
Step 5: Begin Bulk Fermentation
Cover the bowl.
Leave the dough at room temperature for approximately 4–6 hours, depending on the temperature of your kitchen.
During the first 2–3 hours, perform several rounds of stretch-and-folds.
The original recipe recommends stretching the dough, folding it over itself, and rotating the bowl every 30 minutes during the early part of fermentation.
Step 6: Stretch and Fold
To perform a stretch-and-fold:
- Wet your hands.
- Grab one side of the dough.
- Gently stretch it upward.
- Fold it toward the center.
- Rotate the bowl.
- Repeat on the remaining sides.
Do this approximately every 30 minutes for the first 2–3 hours.
These folds strengthen the gluten structure without traditional kneading.
As the dough develops, it should become smoother, more elastic, and easier to handle.
Step 7: Know When Bulk Fermentation Is Finished
Don’t rely exclusively on the clock.
The dough should become:
- Noticeably puffier
- Airy and slightly jiggly
- Filled with visible bubbles
- Approximately 30–50% larger in volume
The source recipe also uses these visual signs to determine when bulk fermentation is complete.
If the dough still looks dense and flat, it may need more fermentation time.
Step 8: Pre-Shape the Dough
Lightly flour your work surface.
Carefully turn the dough out of the bowl.
Try not to aggressively press the air out.
Gently shape the dough into a loose round.
Allow it to rest for approximately 20 minutes.
This short bench rest allows the gluten to relax before final shaping.
Step 9: Shape the Loaf
After the bench rest, shape the dough into a tighter round.
Fold the outer edges toward the center and create enough surface tension for the dough to hold its shape.
Turn it seam-side down and gently drag it across the work surface to tighten the outer surface.
The finished dough should form a smooth, relatively tight ball.
Step 10: Transfer to a Proofing Basket
Generously dust a banneton with flour.
Rice flour is particularly useful because it helps prevent the wet dough from sticking.
If you don’t have a banneton, line a bowl with a clean kitchen towel and dust it generously with flour.
Place the shaped dough into the basket with the seam facing upward.
Step 11: Cold Proof Overnight
Cover the dough.
Place it in the refrigerator for approximately 12–16 hours.
The cold proof slows fermentation while allowing the sourdough flavor to develop.
It also makes the dough easier to score and transfer into the hot Dutch oven.
Overnight proofing is convenient because you can prepare the dough in the evening and bake it the next morning.
Step 12: Preheat the Dutch Oven
Place your Dutch oven, including its lid, inside the oven.
Preheat to 475°F (245°C).
Allow it to heat thoroughly for approximately 30–45 minutes.
A properly heated Dutch oven helps create strong oven spring and a crisp, beautifully developed crust.
Step 13: Score the Dough
Remove the chilled dough from the refrigerator.
Place a sheet of parchment paper on your work surface.
Carefully turn the dough onto the parchment.
Use a bread lame or very sharp knife to make one decisive slash across the top.
You can also create decorative patterns if desired.
Scoring gives the expanding loaf a controlled location to open during baking.
Step 14: Bake Covered
Carefully transfer the dough into the preheated Dutch oven.
Place the lid on securely.
Bake at 475°F (245°C) for approximately 25 minutes.
The covered Dutch oven traps steam around the dough.
This helps the loaf expand and produces a thinner, crispier crust.
Step 15: Bake Uncovered
Remove the Dutch oven lid.
Reduce the oven temperature to 450°F (232°C).
Continue baking for approximately 20–25 minutes.
The loaf should become deeply golden brown.
If you prefer a darker, more intensely caramelized crust, you can extend the uncovered baking slightly, watching carefully to prevent burning.
Step 16: Cool Completely
Remove the finished loaf from the Dutch oven.
Place it on a wire rack.
Now comes the difficult part: wait before slicing.
Allow the bread to cool for approximately 3–4 hours.
Although the loaf smells wonderful straight from the oven, cutting it too early can result in a gummy or compressed interior.
Once completely cooled, use a serrated bread knife to slice it.
Tips for Better Sourdough Bread
Use an Active Starter
Your starter is the engine behind the bread.
It should be bubbly and active before you begin. A sluggish starter can produce a dense loaf.
Don’t Rush Fermentation
Temperature makes a major difference.
A cool kitchen may require longer fermentation, while a warm kitchen can accelerate the process.
Use a Kitchen Scale
Sourdough is much easier to reproduce when ingredients are measured in grams.
Don’t Add Too Much Flour
It’s tempting to add flour when the dough feels sticky.
However, excessive flour can make the finished loaf dense.
Use lightly wet hands during folding instead.
Give the Oven Enough Time to Heat
A thoroughly preheated Dutch oven provides the heat and steam needed for excellent oven spring.
Why Is My Sourdough Not Rising?
A weak or inactive starter is one of the most common reasons.
If your starter isn’t doubling reliably after feeding, give it additional feedings before attempting the loaf.
The source recipe recommends strengthening a weak starter with several feedings before baking.
Other possible causes include:
- Under-fermentation
- Kitchen temperature that’s too cold
- Too much salt
- Incorrect hydration
- Insufficient gluten development
Why Is My Sourdough Gummy?
A gummy crumb can have several causes.
The loaf may have been:
- Underbaked
- Sliced while still hot
- Under-fermented
- Made with an immature starter
The simplest fix is to allow the loaf to cool completely before slicing.
Can I Skip the Overnight Proof?
Yes, although the flavor and texture may be different.
A cold overnight fermentation gives the dough more time to develop its characteristic sourdough flavor.
If you need to bake the same day, you can use a room-temperature final proof instead, but you’ll need to monitor the dough carefully so it doesn’t overproof.
How to Store Sourdough Bread
Once completely cooled, store the loaf at room temperature.
A bread bag, bread box, or paper bag works well.
Avoid sealing a warm loaf in plastic because trapped moisture can soften the crust.
For the best crust, enjoy the bread within the first couple of days.
Can You Freeze Sourdough Bread?
Yes.
For convenience, slice the completely cooled loaf before freezing.
Place parchment paper between slices and store them in a freezer-safe bag.
When you’re ready to eat, toast individual slices directly from frozen.
This is a great way to preserve homemade sourdough without allowing the entire loaf to go stale.
Serving Ideas
Fresh sourdough is delicious in countless ways.
Simple Buttered Toast
Toast a thick slice and spread with salted butter.
Avocado Toast
Top with mashed avocado, black pepper, and a squeeze of lemon.
Breakfast Sandwich
Use two slices for eggs, cheese, vegetables, or your favorite breakfast filling.
Soup Companion
Serve thick slices alongside tomato soup, chicken soup, vegetable soup, or creamy mushroom soup.
French Toast
Day-old sourdough makes excellent French toast because the sturdy crumb absorbs the egg mixture without falling apart.
Garlic Bread
Brush slices with garlic butter and toast until golden and fragrant.
Nutrition Information
Approximate nutrition per slice, assuming the loaf is cut into 12 slices:
- Calories: 175
- Protein: 6 g
- Carbohydrates: 33 g
- Fat: 1–2 g
- Fiber: 2 g
- Sugar: Less than 1 g
- Sodium: Approximately 320 mg
Nutrition values are estimates and will vary depending on the flour, starter, slice size, and exact ingredients used.
Frequently Asked Questions
Can I use all-purpose flour?
Yes, although bread flour generally provides stronger gluten development and can help produce a chewier, more structured loaf.
Can I leave out the whole wheat flour?
Yes. You can replace it with additional bread flour, although the flavor and texture will change slightly.
Do I need a Dutch oven?
A Dutch oven is highly recommended because it creates a steamy environment during the first stage of baking. However, sourdough can also be baked using a baking stone or steel with a separate steam source.
How do I get a crispier crust?
Bake uncovered long enough to develop a deep golden-brown crust, and allow the bread to cool uncovered on a wire rack.
Why did my loaf spread?
The dough may have been over-fermented or insufficiently shaped. Strong stretch-and-folds and proper fermentation can help the dough hold its structure.