 admin1
Rich, Creamy & Surprisingly Easy to Make at Home
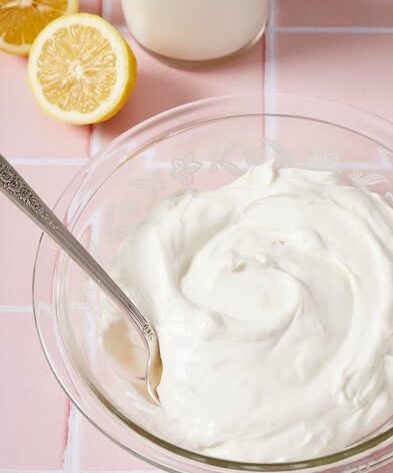
Homemade Cream Cheese is smooth, tangy, and incredibly fresh, with a rich flavor that far surpasses many store-bought varieties. Made from just a few simple ingredients, this versatile spread is perfect for bagels, cheesecakes, frostings, dips, sauces, and countless other recipes.
The process involves curdling milk and cream with an acidic ingredient, then draining away the whey to create a luxuriously creamy cheese. Once you make cream cheese at home, you’ll appreciate its fresh taste and customizable texture.
Why You’ll Love This Recipe
- Only a few ingredients required
- Rich and creamy texture
- No special equipment needed
- More flavorful than store-bought
- Easy to customize with herbs or spices
- Perfect for baking and spreading
- Budget-friendly
Prep Time, Cook Time & Yield
- Prep Time: 10 minutes
- Cook Time: 15 minutes
- Drain Time: 8–12 hours
- Total Time: Approximately 9–13 hours
- Yield: About 2 cups cream cheese
Ingredients
Main Ingredients
- 4 cups (1 liter) whole milk
- 2 cups (500ml) heavy cream
- 3 tablespoons fresh lemon juice or white vinegar
- ½ teaspoon salt
Optional Flavor Additions
Savory
- Garlic powder
- Chopped chives
- Fresh dill
- Black pepper
Sweet
- Honey
- Cinnamon
- Vanilla extract
Equipment Needed
- Heavy-bottom saucepan
- Thermometer
- Cheesecloth
- Fine mesh strainer
- Large bowl
- Food processor or blender
Step-by-Step Instructions
Step 1: Heat the Milk and Cream
Pour the milk and heavy cream into a large saucepan.
Heat over medium heat until the mixture reaches:
85°C (185°F)
Stir occasionally to prevent scorching.
Do not allow the mixture to boil vigorously.
Step 2: Add the Acid
Remove the pan from heat.
Slowly stir in:
- Lemon juice or vinegar
Continue stirring gently for about 1 minute.
The mixture should begin separating into curds and whey.
Step 3: Rest the Mixture
Allow the mixture to sit undisturbed for:
15 minutes
During this time the curds will fully develop.
You should see:
- White curds
- Pale yellow whey
Step 4: Strain the Curds
Line a fine mesh strainer with cheesecloth.
Place the strainer over a large bowl.
Carefully pour the curdled mixture into the cheesecloth.
Allow the whey to drain.
Step 5: Drain Thoroughly
Gather the corners of the cheesecloth and tie securely.
Hang over a bowl or place in the strainer.
Drain for:
Soft Cream Cheese
- 6–8 hours
Firm Cream Cheese
- 10–12 hours
Drain in the refrigerator for food safety.
Step 6: Blend Until Smooth
Transfer the drained curds to a food processor.
Add:
- Salt
Blend for:
2–3 minutes
until smooth and creamy.
Scrape down the sides as needed.
For extra smooth cream cheese, blend a little longer.
Step 7: Adjust Texture
If too thick:
Add:
- 1–2 teaspoons reserved whey
If too thin:
Drain longer before blending.
Step 8: Chill
Transfer cream cheese to an airtight container.
Refrigerate for:
At least 2 hours
before serving.
The texture will continue to firm up as it chills.
Temperature Summary
| Step | Temperature |
|---|---|
| Heating Milk & Cream | 85°C (185°F) |
| Chilling | 4°C (40°F) |
Flavor Variations
Garlic Herb Cream Cheese
Mix in:
- 1 teaspoon garlic powder
- 2 tablespoons chopped chives
- 1 tablespoon fresh dill
Perfect for bagels and sandwiches.
Honey Cinnamon Cream Cheese
Add:
- 2 tablespoons honey
- ½ teaspoon cinnamon
Ideal for toast and pastries.
Strawberry Cream Cheese
Blend in:
- ¼ cup finely chopped strawberries
- 1 tablespoon honey
A delicious breakfast spread.
Jalapeño Cream Cheese
Mix in:
- 1 finely diced jalapeño
- ½ cup shredded cheddar
Great for crackers and dips.
Ways to Use Homemade Cream Cheese
Breakfast
- Bagels
- Toast
- English muffins
- Pancakes
Baking
- Cheesecake
- Frosting
- Danish pastries
- Cream cheese bars
Savory Recipes
- Pasta sauces
- Dips
- Stuffed chicken
- Sandwich spreads
Storage Instructions
Refrigerator
Store in an airtight container for:
7–10 days
Freezer
Freeze for:
Up to 2 months
Note: Frozen cream cheese may become slightly crumbly after thawing but remains suitable for cooking and baking.
Tips for Success
Use Full-Fat Dairy
Low-fat milk will not produce the same rich texture.
Don’t Boil the Milk
Overheating can create grainy curds.
Drain in the Refrigerator
This keeps the cheese fresh and safe.
Blend Thoroughly
Proper blending creates a silky-smooth texture.
Save the Whey
Use leftover whey in:
- Bread recipes
- Smoothies
- Soups
Common Mistakes to Avoid
Not Reaching Proper Temperature
Milk must reach approximately 85°C (185°F) to form good curds.
Insufficient Draining
Too much moisture leads to runny cream cheese.
Overheating
Boiling can negatively affect texture.
Skipping the Chill Time
Chilling improves flavor and consistency.
Nutritional Information
Approximate per 2 tablespoons:
- Calories: 95
- Protein: 2g
- Carbohydrates: 1g
- Fat: 9g
- Saturated Fat: 6g
- Cholesterol: 30mg
- Sodium: 55mg
- Sugar: 1g
Frequently Asked Questions
Can I use vinegar instead of lemon juice?
Yes. Both work equally well for curdling the dairy.
Why is my cream cheese grainy?
Usually caused by:
- Overheating
- Insufficient blending
- Poor-quality dairy
Can I make this with only milk?
You can, but adding cream creates the rich texture associated with traditional cream cheese.
Is homemade cream cheese good for cheesecake?
Absolutely. It works beautifully in baked and no-bake cheesecakes.