 admin1
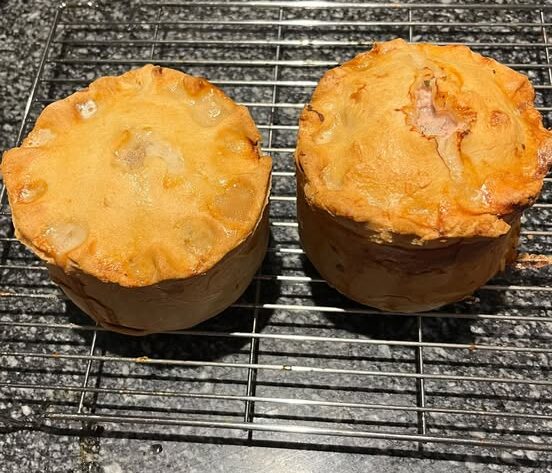
Enjoy the comforting taste of homemade pie without gluten! These gluten-free pies feature a tender, buttery crust, delicious fillings, and a golden finish that makes them perfect for holidays, family gatherings, or everyday desserts.
Whether you love classic apple pie, creamy pumpkin pie, savory chicken pot pie, or a sweet berry pie, this gluten-free pie recipe guide will help you create delicious results using simple ingredients and easy techniques.
Why You’ll Love These Gluten-Free Pies
- Gluten-free: Made with gluten-free flour instead of traditional wheat flour.
- Tender and flaky: A buttery crust with a delicious texture.
- Versatile: Perfect for sweet or savory fillings.
- Easy to prepare: Simple ingredients and straightforward instructions.
- Make-ahead friendly: Prepare the dough in advance for convenient baking.
Recipe Overview
| Details | Information |
|---|---|
| Preparation Time | 25 minutes |
| Chilling Time | 30 minutes |
| Baking Time | 40–50 minutes |
| Total Time | 1 hour 45 minutes |
| Servings | 8 slices |
| Course | Dessert or Main Course |
| Cuisine | American |
| Oven Temperature | 375°F (190°C) |
Ingredients
For the Gluten-Free Pie Crust
- 2½ cups (300 g) gluten-free all-purpose flour blend
- 1 tablespoon granulated sugar (for sweet pies)
- ½ teaspoon salt
- 1 teaspoon xanthan gum (if not already included in the flour blend)
- ¾ cup (170 g) cold unsalted butter, cubed
- 1 large egg
- 4–6 tablespoons ice-cold water
- 1 teaspoon apple cider vinegar (optional)
For a Classic Apple Pie Filling
- 5 medium apples, peeled and thinly sliced
- ½ cup (100 g) brown sugar
- 2 tablespoons cornstarch
- 1 teaspoon ground cinnamon
- ¼ teaspoon ground nutmeg
- 1 tablespoon lemon juice
- 1 teaspoon vanilla extract
- 1 tablespoon butter
For the Egg Wash
- 1 egg
- 1 tablespoon milk
For a savory pie, omit the sugar from the crust and use your favorite gluten-free filling.
Instructions
Step 1: Prepare the Gluten-Free Flour Mixture
In a large mixing bowl, combine the gluten-free flour blend, sugar, salt, and xanthan gum if needed.
Whisk the ingredients together until evenly distributed.
Using a gluten-free flour blend designed for baking generally produces better results than using a single flour such as almond flour or coconut flour.
Step 2: Add the Cold Butter
Add the cold cubed butter to the flour mixture.
Using a pastry cutter or your fingertips, work the butter into the flour until the mixture resembles coarse breadcrumbs.
Leave a few small pieces of butter visible. These help create a tender, flaky crust.
Step 3: Add the Wet Ingredients
Whisk the egg, apple cider vinegar, and 4 tablespoons of ice-cold water in a small bowl.
Pour the mixture into the flour and butter mixture.
Stir gently until the dough begins to come together. Add more water, one tablespoon at a time, if needed.
The dough should hold together when pressed without becoming sticky.
Step 4: Chill the Dough
Divide the dough into two portions, one slightly larger than the other.
Shape each portion into a disc and wrap it tightly.
Refrigerate for at least 30 minutes.
Chilling helps the butter remain cold and makes the dough easier to roll.
Step 5: Prepare the Apple Filling
In a large bowl, combine the sliced apples, brown sugar, cornstarch, cinnamon, nutmeg, lemon juice, and vanilla extract.
Mix until the apples are evenly coated.
Allow the filling to rest for 10 minutes while preparing the crust.
Step 6: Roll Out the Pie Crust
Place the larger dough disc between two sheets of parchment paper.
Roll it into a circle approximately 12 inches in diameter.
Carefully remove the top parchment sheet and use the bottom sheet to help transfer the dough into a 9-inch pie dish.
Press gently into the dish, trimming any excess dough.
Step 7: Fill the Pie
Pour the apple filling into the prepared crust.
Dot the filling with small pieces of butter.
Roll out the second dough disc and place it over the filling.
Trim and seal the edges, then cut a few small vents in the top crust to allow steam to escape.
Step 8: Add the Egg Wash
Whisk together the egg and milk.
Brush lightly over the top crust to encourage a beautiful golden finish.
For a decorative touch, sprinkle a little coarse sugar over the crust.
Step 9: Bake the Pie
Preheat the oven to 375°F (190°C).
Bake for 40–50 minutes, or until the crust is golden brown and the apple filling is bubbling.
If the edges begin browning too quickly, cover them loosely with aluminum foil.
Step 10: Cool Before Slicing
Remove the pie from the oven and allow it to cool for at least 2 hours.
Cooling helps the filling set and makes slicing much easier.
Serve warm or at room temperature.
Nutrition Information
Estimated nutrition per slice, based on 8 servings of gluten-free apple pie.
| Nutrient | Amount |
|---|---|
| Calories | 390 kcal |
| Carbohydrates | 57 g |
| Protein | 4 g |
| Fat | 17 g |
| Saturated Fat | 10 g |
| Fiber | 3 g |
| Sugar | 27 g |
| Sodium | 230 mg |
Nutrition values are approximate and will vary depending on the flour blend, butter, and filling ingredients.
Best Gluten-Free Pie Filling Ideas
Pumpkin Pie
Creamy pumpkin puree with cinnamon, nutmeg, and a smooth custard filling.
Blueberry Pie
Juicy blueberries with lemon zest and a lightly sweetened filling.
Chicken Pot Pie
Tender chicken, carrots, peas, and creamy gluten-free gravy.
Pecan Pie
A rich, sweet filling with crunchy pecans and a buttery crust.
Tips for Perfect Gluten-Free Pie Crust
Keep the Butter Cold
Cold butter is essential for creating a tender crust. If the butter becomes too warm, refrigerate the dough before rolling.
Use Parchment Paper
Gluten-free dough can be more delicate than traditional pastry. Rolling between parchment paper helps prevent sticking and tearing.
Choose the Right Flour Blend
Use a gluten-free flour blend specifically designed for baking. Some blends contain xanthan gum, which helps bind the dough and improve its structure.
Don’t Skip Chilling
Allowing the dough to rest in the refrigerator improves its handling and helps the crust hold its shape during baking.
Avoid Overworking the Dough
Mix only until the dough comes together. Excessive mixing can make the crust dense rather than tender.
Sweet and Savory Gluten-Free Pie Variations
1. Gluten-Free Lemon Meringue Pie
Use a gluten-free pastry crust filled with tangy lemon curd and topped with fluffy meringue.
2. Gluten-Free Chocolate Cream Pie
Fill a baked gluten-free pie shell with rich chocolate pudding and finish with whipped cream.
3. Gluten-Free Vegetable Pie
Combine spinach, mushrooms, onions, and cheese for a delicious savory vegetarian pie.
4. Gluten-Free Steak and Ale Pie
Use tender beef, mushrooms, onions, and gluten-free gravy for a hearty dinner.
5. Gluten-Free Sweet Potato Pie
Replace pumpkin puree with mashed sweet potato and add cinnamon, vanilla, and nutmeg.
How to Store Gluten-Free Pies
- Room temperature: Fruit pies can generally be stored covered for up to 2 days in a cool environment.
- Refrigerator: Store custard, cream, pumpkin, and meat pies in the refrigerator for up to 3–4 days.
- Freezer: Freeze baked fruit pies or unbaked pie crusts for up to 3 months.
For the best texture, reheat fruit pie in a 300°F (150°C) oven until warmed through.
Frequently Asked Questions
Can I make gluten-free pie crust without xanthan gum?
Yes. Use a gluten-free flour blend that already contains xanthan gum or another suitable binder. If your blend does not contain one, the crust may be more fragile.
Why does my gluten-free pie crust crumble?
Gluten-free dough can crumble if it contains too little moisture or has not rested sufficiently. Add cold water gradually until the dough holds together when pressed.
Can I make gluten-free pie crust dairy-free?
Yes. Replace butter with a cold, firm dairy-free baking butter. Check that your other ingredients are also dairy-free.
Can I prepare the pie crust ahead of time?
Absolutely! The dough can be refrigerated for up to 2 days or frozen for up to 3 months. Thaw frozen dough overnight in the refrigerator before rolling.
Is gluten-free pie suitable for people with celiac disease?
It can be, provided every ingredient is gluten-free and cross-contact is avoided. Use certified gluten-free ingredients where appropriate and prepare the pie with clean utensils and equipment.


